Well here I am back at another project containing a multitude of rust. Needless to say if it weren't for rust I wouldn't have nearly as much business! :)
This project came to me as a referral from a local artist, friend, and Pinstriper extraordinaire "Igor" Acord. In a previous post I worked on the floor replacement in his 1935 Ford Humpback. The floors turned out pretty nice and apparently he agreed since he sent Ginny and Scott my way with this seriously cool little Fiat.
Just dropped off and begging to be cut!
Isnt that cute! The covered car is my wifes 1946 Plymouth.
Sure dwarfs this little Fiat!
The doors folding back so far is an incredible help here.
After I pulled it in the garage, I realized that maybe I need to get smaller project cars! This thing fits beautifully!
Drivers side, rear floor.
Rubber spacers WERE being used to lift the seat to account for years of leaning back in the seat and bending the seat back. (The seats will be fixed as well) :-)
Emergency escape for mice? Hmmmm
Drivers side floor. (someone along the way has knocked holes in the floor to access some bolts)
Passenger side rear floor.
Passenger floor. This is most definitely the second time the floor pans have been replaced! (You'll see)
Again with the bolt access holes. :-/
Some of the first evidence I see of a previous repair.
More previous repair.
Again with the old replacement work. This is along the center of the car, which happens to be the heating channel for the entire car. (Similar to a VW floor pan)
More weld along side the seat rails.
This is actually covered by a sheet metal cap which contains a lever. The lever actuates the rod (sticking out of the tube on the left) which opens a valve allowing heat from the engine into the cabin of the car through the channel in the middle.
More of the previous repair. This was pretty rough work here. Lots of beating and banging was had in this area. Not to mention layer after layer of sheet metal.
More of the same...
Again with the poor welds.
Let the layers begin! Here you can see the 1st one peeled back. This was the floor that the seat was mounted on.
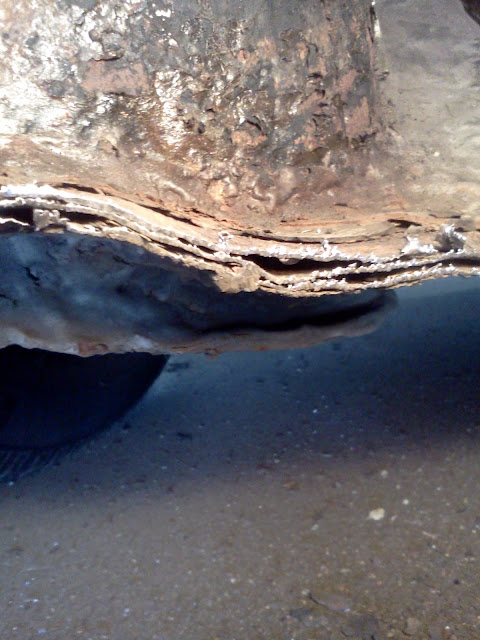
Here you can see 4 layers!!!! Lots of repairs have happened and not the right way!
Needless to say... Me and my ways have removed all the excess sheet metal in preparation for the new pans.
Again with all the layers! Ugh!!!!
This is the inner fender well. This area is going to be interesting! There is a lot of patch work under there. Its holding out ok, but itll be a challenge to find good clean steel to weld to.
Lastly...... A sneak peek! I am just fitting the panel at this point. I still have a good hour or two in prepping the surfaces for weld, making sure the panel is a quality fit. Then I plan to drill holes around the perimeter of the floor pan in order to "plug weld" the pan to the flange (ledge) that I managed to save all the way around.
By doing it this way (Plug welding) it will be very close in appearance to factory style "spot welds" as well as, not leave an weld for me to grind down.
Thats it for now.... I wont be getting back to it for a few days as my daily life takes precedence!
Pin It Now!


